Ever found yourself halfway through a backpacking trip, flipping through your camera roll, and realizing your shots don’t quite capture the magic of the trail? Yeah, me too. Backpacking photography is an art, but with the right trail documentation tips, you can turn your outdoor adventures into storytelling gold.
Read More About Backpacking Photography
Packing Light Without Sacrificing Quality
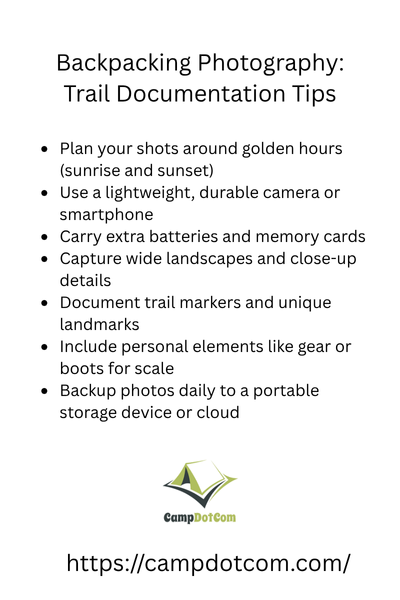
First things first, let us talk gear. You do not want to lug around a full studio setup while tackling steep switchbacks. The trick is to strike a balance between quality and portability.
I used to carry a bulky DSLR with multiple lenses, but after one particularly grueling hike where I felt more like a pack mule than a photographer, I made some changes. Now I stick to a mirrorless camera with a versatile zoom lens. It is light enough to carry but powerful enough to get those crisp landscape shots.
As an Amazon Associate, I earn from qualifying purchases. Some of the links in this article are affiliate links. This means that, at zero cost to you, I will earn an affiliate commission if you click through the link and finalize a purchase.
If you prefer using your phone, invest in a small attachable lens kit and a lightweight tripod. Trust me, a tiny bit of stabilization makes all the difference when you are shooting in low light or capturing timelapses of a sunrise.
Finding the Perfect Shot—Even When You’re Exhausted
Let’s be real—hiking is tiring. After a long day on the trail, the last thing you might feel like doing is setting up for the perfect shot. But here’s a trick: train yourself to “see” shots before you even reach for the camera.
More Things to Know About Backpacking Photography

Look for leading lines, like a winding trail disappearing into the trees. Use natural frames—overhanging branches, cave openings, or even your own trekking poles—to create depth. And never underestimate the power of golden hour; that soft, warm light makes even the most ordinary landscapes look dreamy.
Capturing Motion and Mood
Backpacking photography isn’t just about landscapes. You’re documenting an experience, and that means capturing movement and emotion.
Ever tried taking a photo of a friend crossing a river, only to end up with a blurry mess? I’ve been there. A faster shutter speed helps freeze motion, but if you want to show movement—say, a waterfall or the wind rustling leaves—try a slower shutter speed with a steady hand (or that lightweight tripod you packed!).
And don’t forget the human element. The way your hiking buddy grins at the summit, the look of pure exhaustion (or triumph!) after a tough climb—those are the shots that make your trail documentation feel alive.
Dealing with Unpredictable Weather
Mother Nature loves to throw curveballs. One minute, it’s blue skies and sunshine; the next, you’re scrambling to keep your camera dry in a sudden downpour.
I always carry a few resealable plastic bags to protect my gear when it rains. If you’re using a phone, a simple waterproof case works wonders. And for those moody, overcast days? Lean into it. Fog, mist, and stormy skies can add incredible drama to your shots. Some of my favorite trail photos were taken in weather I originally grumbled about!
Night Photography: A Whole New World
There’s something magical about capturing the trail after dark. Whether it’s a sky full of stars or the warm glow of a campfire, night photography brings a whole new perspective to backpacking.
One night in the Rockies, I set up my camera for a long exposure of the Milky Way—only to realize I’d forgotten my tripod. I ended up using my backpack as a makeshift stabilizer, and the result? One of my favorite shots ever. Moral of the story: use what you have and get creative!
If you’re new to night shots, start with a high ISO, a slow shutter speed, and a steady surface. And if you’re aiming for star trails? Set your camera to take multiple long-exposure shots and stack them later. (Bonus: You’ll impress your friends with some seriously cool results.)
Bringing It All Together: Telling the Full Story
A single photo is great, but a series of shots that tell a story? That’s where the magic happens. Think of your backpacking photography as a visual journal.
Start with a shot that sets the scene—maybe your packed gear at the trailhead. Capture moments along the way—your muddy boots, a breathtaking overlook, the faces of fellow hikers. End with a final shot that wraps up the journey, whether it’s a sunrise from your campsite or a well-earned meal at the end of the trek.
The Final Frame on Backpacking Photography
At the end of the day, backpacking photography is not about perfection. It is about capturing the raw, beautiful, and sometimes messy experience of being out in nature. So do not worry about getting every shot technically perfect. Capture what feels right, try different angles, and most importantly, enjoy the journey.
Now, grab your camera (or your phone), lace up those hiking boots, and hit the trail. Happy shooting.